See “Cloth Diapering an Infant – What’s Cheapest?” here and “Cloth Diapering an Infant – What’s Best?” here.
——————————————–
The How-To’s of cloth diapering an infant are divided into the following categories:
- Folding
- Changing
- Rashes
- Washing
- Night-times
Folding
If you use pocket diapers, folding will be very similar to, if not exactly the same as putting on a disposable. Slide the diaper under the baby bum, bring tabs around, and either velcro or snap to the front. Make sure the diaper is not too loose, where as “explosions” may escape out the back, or too tight, which may leave red marks and irritate baby.
If you are using fitted diapers and covers, put the fitted diaper on like a disposable, slide the cover under, attach (again) like a disposable, and you’re done.
If you are using prefolds, there are many different options for folding. And you can create your own. We created our own fold to try to reduce the notorious bulkiness of prefolds. Here it is in step-by-step illustrated format:
(Originally posted September 2007)

Lay diaper flat, like so.
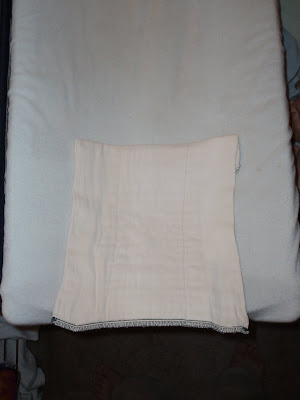
Fold the top couple inches under.
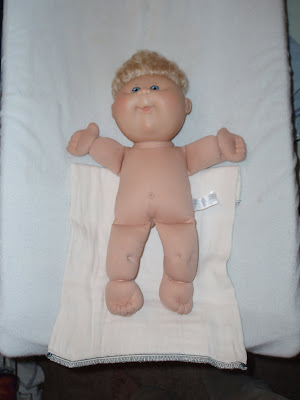
Place baby on top.
(I actually first place baby on changing pad, and slide a dipe under real smooth-like before even taking the dirty dipe off.)
Fold the bottom half of the dipe into thirds.

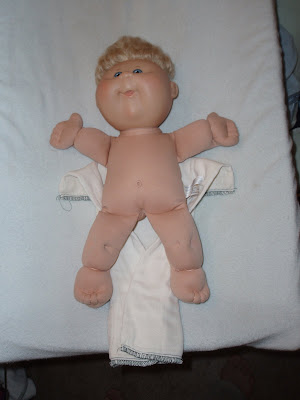
Bring folded part up between legs.
Spread the top front part out a bit (so the mass is evenly distributed and the diaper-bulge is therefore lessened).
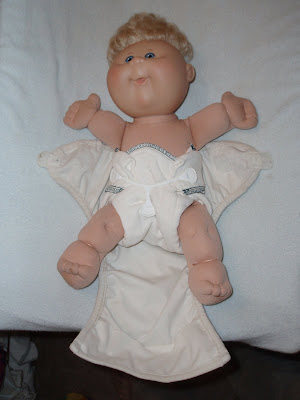
Using Snappi, (sorry, would have used a brighter color, but they were either being used or unaccounted for), sink those little plastic teeth into the fabric as shown.
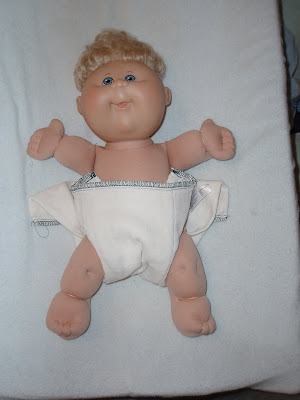
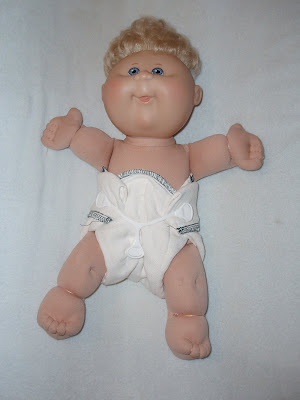
Slide diaper cover or wrap underneath.
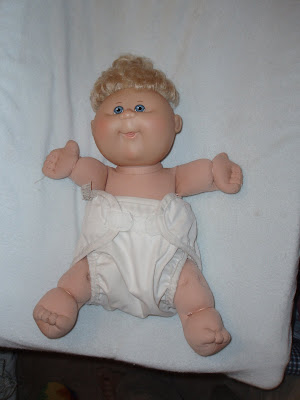
Bring velcro around to fasten. Check to make sure diaper is not poking out through the leg holes or anywhere else. Anywhere the diaper is showing, wetness will escape!
This is my award-winning diaper fold that reduces as much bulk as physically possible. It’s not complicated. We could do it in our sleep.
Changing
Cloth diapers need to be changed more often than disposables. Every three to four hours is a good rule of thumb, except for night-times, which we’ll get to later. It has been our experience, that cloth diapers have to actually be checked for messes – they contain the smell that much better than disposables! So if your little one usually goes in the middle of the morning and it’s 11am and you don’t smell anything, you may want to go ahead and take a peek.
What do you do when you find a mess? That depends on what your baby is eating. If your baby is exclusively breastfed, then the entire mess can go in your diaper pail. As I mentioned in a previous post, breastmilk was intended to be digested by babies and is done so very well. What is left is very liquid-y and washes away in the pre-rinse cycle wonderfully (I’ll talk further about washing instructions later).
If your baby is eating solids, then it stands to reason that the mess will also be more solid. Shake off as much as you can into the toilet. And souces vary after this point. Some say this is all that is necessary! Some can’t help but dunk until the rest comes off. I fall into the latter category. A couple years into my cloth diapering, I finally invested in a diaper sprayer, and I have never looked back. If you can afford it (and it’s only around $40), get one!
If you are using prefolds, toss the dirty prefold in the pail and inspect the cover. If the cover remains un-messed, then lay it out to air a bit – it can be used again. If it does have a mess on it, you can either toss it in the diaper pail, or if you’re down to your last two covers (I’ve been there!), you can wash it quickly by hand in the bathroom and hang it to dry. It should only take a couple hours to dry.
If you are using an all-in-one, toss all in the pail. (Make sure you secure velcro tabs to laundry tabs to prevent excessive wear and tear on your velcro – and the notorious diaper chain that comes out of the dryer!)
If you are using a pocket diaper, try to figure out a way to shake the insert out of the opening without having to dig for it. With bumGenius diapers, simply hang the diaper upside down with one hand, pull back on the bottom end with the other (thus opening the pocket) and shake. FuzziBunz have no flap over their pocket, so simply shaking from the top should be sufficient. Baby Kangas, well, I’ve yet to figure out a good way to shake with these, but the opening is on the outside, so at least I’m not touching poo when I dig for the insert.
Rashes
Rashes have been an inevitable part of our diapering experience. There are many, many reasons why a rash would spring up.
- Teething. An old wives’ tale, perhaps, but I’ve noticed a correlation!
- A poopy gone unnoticed too long
- Laundry detergent causing irritation
- Build-up on diapers causing irritation
- MRSA. I hope you never have this reason!
I’ll talk more about laundry detergent in the Washing section. For now, I’ll just explain how to treat rashes while wearing cloth diapers. Feel free to use your favorite diaper rash cream, but know that it should NEVER come in contact with your diaper. Diaper rash creams work so well because they create a barrier between your baby’s skin and the wetness of the diaper. They will also create a barrier on your diaper! This will repel liquids! Not good!
There are different ways to get around this. One would be to buy flushable liners (like this or this). Another is to make your own liners out of fleece. Cut strips of fleece that would fit down the middle of your diaper. Wetness will pass right through them, but not the cream! Now, to be sure that none of the cream passes to the diapers, it is best to wash these separately. Simply hang a Wal-Mart bag to collect them and toss them in their own wash. I, personally, have never seperated them. But I felt I should warn you.
Fleece liners also are good to prevent rashes in prefolds, as they keep baby’s skin dry.
I have recently learned that there are creams that will NOT build up on diapers. Here is a list of acceptable creams.
Washing
To wash a normal load of diapers, follow these steps:
- Dump diapers and pail liner all into the wash basin (without soap). Set water temperature to cold, spin level to high, wash cycle to pre-rinse. This will wash away all nasties.
- When pre-rinse is done, set water temperature to hot, keep spin level high, and set wash cycle to the longest setting (with the most agitation). Add detergent. The usual recommendation for detergent is 1/2 to 1/4 the amount you use in a normal load. But depending on your water hardness level, you may have to play around to get it right. You do not want bubbles in your final rinse agitation; if there are any, you used too much detergent.
- After wash is done, set washer to rinse again. This will ensure that all the detergent rinses off the diapers.
Now for the tricky part: What detergent do I use?
Several aspects of laundry detergent can irritate a baby’s skin: artifical colors and dyes, whitening/brightening agents, too much detergent used, specific brand of detergent used. And I’ve had mothers tell me that they use colored/scented Tide on their diapers and have from the beginning and have never had a rash. It all depends on your baby’s bottom. They’re all different!
The detergent that I have had the best luck with (since I’m not one of those lucky mom’s with baby butt’s of steel…) is Allen’s Naturally. It’s not the cheapest, but you only use 2 teaspoons per load (for soft water), so a box lasts a very long time.
Detergent no-no’s: I have read that you should not use “Free and Clear” detergents, as they cause build-up on diapers. You should also avoid baby detergents, such as Dreft and All Baby. Avoid detergents that use actual soap, made from fats (the home-made detergents that use Ivory soap bars fall in this category, as do a lot of other natural detergents) – these build-up significantly on your diapers.
Here is a chart of detergents that uses a star rating system to show how compatible each is with cloth diapers. But, again, I have to stress that this is an individual thing: if your baby has an unexplained rash, try switching detergents!
Another sure thing that will add build-up to your diapers is fabric softener. Do you use liquid fabric softener or fabric softener sheets with your diapers. I’ve heard using vinegar in the rinse cycle does the same thing without the build-up, but bumGenius says specifically not to use vinegar with their diapers.
By this time, you are probably screaming at your monitor, “What is ‘build-up’?!” Build-up on diapers is residue from your detergent that doesn’t wash completely away. And every time you wash your diapers, more builds up. This makes a layer on your diapers that repels liquids. Not good. Diapers are supposed to be absorbant! One would be tempted to think that more detergent should wash away the build-up, right? Most often the opposite is true! When we got our water softener, we dealt with regular build-up for the first time since eliminating our home-made detergent. The soft water meant the detergent wasn’t washing away as well (you know the feeling, when you wash your hands and they still feel soapy after rinsing?) We had to drastically reduce the amound of detergent we were using.
One sign of build-up on diapers is lack of absorbency. To test this, flick water at an insert or prefold. If it beads up and rolls off instead of soaking in, then you have build-up!
Ironically, another sign of build-up, besides a leaky diaper, is a bad smell! You would think, at least, that a build-up of detergent would smell clean, right? Wrong! They smell like pee! And it goes against everything in you, I know, to use LESS soap to try to get that stink out! But that’s what you need to do.
If you have very bad build-up, though, you will need to strip your diapers.
How to strip diapers:
There are different methods to this.
One is to simply wash your diapers without soap until you see no more bubbles in the final rinse agitation.
Another is to wash the diapers using only a tablespoon of Dawn dish detergent (regular strenth and flavor – the blue stuff) and no other detergent.
A third method that I found worked especially well for my stripping needs is OxyClean. But don’t waste your money on the brand-name stuff if you have a Wal-Mart or Dollar General near you – get the Sun brand. It has less fillers, thus a tiny container lasts longer, and it’s cheaper besides! Wash diapers using 3-4 scoops of OxyClean and then dry diapers. If you can flick water at the inserts/prefolds and the water beads up instead of immediately soaking in, repeat. Do this until water sinks in on the flick test.
Night-Time Diapering
When we first started cloth diapering, we did disposables at night. We weren’t quite sure how to make prefolds last more than three hours.
Then we experimented. My memory is fuzzy, but I believe what I did was to put on one prefold as illustrated above, then fold a second in thirds and laid it down the middle of the cover before putting the cover on. So, in essence, the child was in two prefolds.
But, though we knew generations had gone before without anything better, we felt pity and purchased our first two bumGenius pocket diapers for night-times. Pocket diapers are ideal for night-times because you can put as many inserts as will fit inside (the general populace finds two microfiber inserts to be sufficient for 8-10 hours). And the suedecloth lining keeps baby dry all night. All-in-ones can not have their absorbency adjusted that way.
——————————————————
And, believe it or not, I think I’m finally done with this post. Not that I’ve exhausted my knowledge on the subject (I’ve had to do a lot of research over the years), but rather, that’s enough for now, the weather’s beautiful, and I want to go play outside. If you have any questions I didn’t cover, let me know!
THANK YOU!!!
Awesome series of posts!!! I did not cloth diaper until my kids were older so I have been rather nervous about cloth diapering an infant. Your posts make it seem a lot less complicated than I was making it in my mind.
this is a really good post with a lot of info. I was searching around earlier today for info on how to ‘get the stink out’ of my BGs and found some great info on another page but this is much more succinct.
We have very hard water here and maybe I AM using too much powder…like you say it goes against the grain to use LESS if you want it cleaner…!
I tried prefolds but just didn’t like them. I WANTED to like them but I didn’t. 🙁 I have all BGs now and this stink problem is driving me up the wall. It’s hard to convince your friends that cloth diapering is *GREAT!* when your whole house seems to stink like pee…
Thanks for this! As to Free and Clear detergents causing build up, I think this really only applies to pocket diapers because they are made with microfiber instead of cotton. I’ve been using a basic, cheap, free and clear detergent on my prefolds for years and have never had any problem with build-up or decreased absorbancy.
Becca, if your BGs stink, you might actually be using too much detergent. Reduce your amount of detergent to 1/4 of the regular amount per load, and make sure you do an extra rinse after your hot cycle. Take them out and sniff them before you dry–if they don’t smell fresh and clean, try doing another hot cycle and extra rinse *without any detergent*. Airing out in the sun can help as well.
I’ve never seen cloth diaper washing as being that difficult of a thing, but I guess a lot of people do. Do you think that’s the reason that more people don’t use cloth?
I’m actually doing some research about the kinds of diapers that parents use and why. I’d love to include your and your readers’ opinions in my study. You can participate by taking my diaper survey:
http://spreadsheets.google.com/viewform?formkey=cjVCME83a3hKZ1Vzb0t0VENSQVRjLUE6MA..
Thanks In Advance!
Good site dude Thanks
Someone I work with visits your site regularly and recommended it to me to read also. The writing style is superior and the content is interesting. Thanks for the insight you provide the readers!
How many xs and small prefolds would you recommend (until my LO can fit in One Sized dipes)? I’ve never cd’d a newborn…
The range I’ve heard for that age is 18-24. Since they won’t wear that size long,I just put them in boring prefolds and plain white (cheap) covers.
Thanks for another informative web site. The place else may just I am
getting that type of information written in such an ideal approach?
I have a mission that I am just now working on, and I have been
at the glance out for such info.